
Oval Blue Weapon Tutorial
Page 1 of 1

Oval Blue Weapon Tutorial
![]() Izec Thu Jul 07, 2011 8:06 pm
Izec Thu Jul 07, 2011 8:06 pm
How to Make an Oval cross section Blue Weapon.
First, an introduction, and a caveat that I tend to be long winded with forum posts.
So, what follows here is my oval/elliptical blue weapon design. I'm not sure if this shape has been created and used before, but this is what I developed after trying to bridge the gap between rectangle "flat blades" and round/cylindrical blues. My experience has always been that rounds last longer and have better foundations for stabbing tips. I've tried multiple rectangle "flat blade" designs and none of them have lasted as long as the round design I use or this oval design. This all starts with the spiral wrap design, which is what I use for my rounds. I don't know who developed the spiral wrap, but I heard about it from this guy, who heard about it from that guy, etc. The design makes sense and I see it as fully possible that it could have been developed a long time ago and in various places. This oval design is a variation of the spiral wrap design, with basically just flats added to the cylinder to make it into an oval, which I then use like a rectangular "flat blade" (including calling flats if I hit with the flatter side).
Now, a further note before we begin. I'll just say this, if you opt to try this design and then use low quality foam, well, don't expect the design to suddenly make your build magically stronger than what materials you put into it. Garbage in, garbage out. Use high quality foams for the best results. I am now using MC1900 foam that I bought from Polyplastics in Austin, Texas. If you want some of that foam you'll need to place a minimum order (I believe it is currently $75) and I think that they do ship. Google them for contact info.
Previously, I used Volara foam, and the previous version of this weapon lasted me 2 years of consistent use every time I took the field, which would be about 25 - 50 times a year. After having switched to MC1900, I believe this is the highest quality foam I have worked with and I expect it to last beyond my previous Volara build. MC1900 is similar to EVA foam, but I believe it is more tear resistant. YMMV, especially if you use different foams.
Materials: I am using three thicknesses of MC1900 foam, .5" and .375" and .625".
Your chosen core (I use .505" kite spar) and Dap Weldwood Contact Cement
Bi-directional strapping tape (optional)
Packing tape (optional)
Step 1 - prep your core. I tend to roughen up the surface of the core so that the adhesive will stick to it better. I've used rough grit sand paper, rat tail files, or sanders to get the job done. If you don't roughen up the surface of your smooth core, the DAP may not hold as well and the design may not last as long. Sorry, no pretty picture for this one.
Step 2 - Cut down your .5" thickness foam into a 1" strip. Make it as long as you can, the longer the better (that's what she said!) so that you don't have to make a joint in the middle of your spiral wrap. 4+ feet long will typically work for a single blue.
Take that 1" wide strip, DAP the side that you'll be gluing to the core, and DAP your core, too. For the first wrap I tend to start at the top and wrap down to the handle. You'll have to calculate what angle to start your wrap so that the wrap meets after going 1 full way around the core so that there is no gap in the wrap.

Then keep wrapping all the way down the core to the handle (like a barber shop pole). Try not to stretch the foam as you wrap it around core. Due to the wrapping motion some stretching will occur, but try not to crank it down and cause undue stretching of the material.
Step 3 - Cut off the extra material on the tip so that it is flush with the end of the core, then DAP a .5" cap on the end that is the same shape as the foam and core.
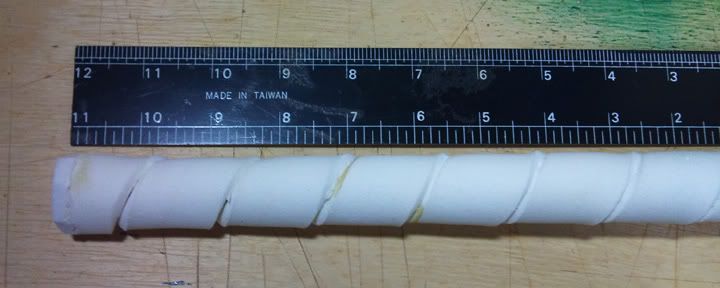
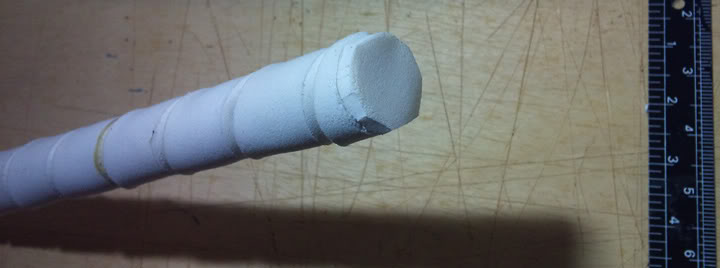
And now it should look like this:
Step 4 -
Cut some strips that are as wide as the foam and the full length of your foam (including the cap you just glued on the end). I tend to cut 4 strips total of .5" foam, and make them a little wider than my spiral wrapped core at this point because I will shape it down later. Glue 2 of the strips down on the sides of the blade to make it like a "flat" blade weapon (one for each side).
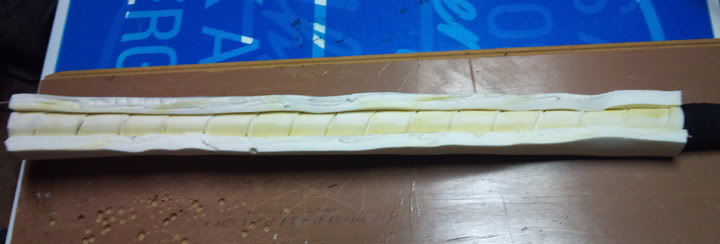
Step 5 - Cap that foam. I use .625" foam for the remaining caps.
Step 6- Glue down 2 more strips for a total of 4, again capping at the end.
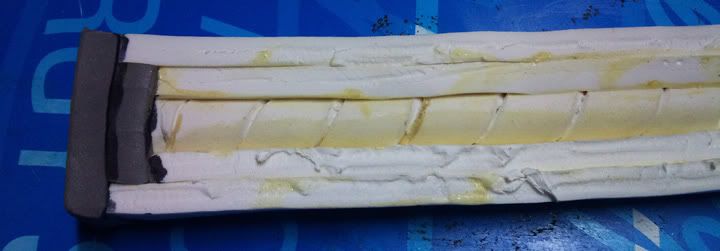
At this point, yes, I realize that my weapon blade looks ugly and amateurish. I tend to cut the strips a bit wider than needed and then clean it up and shape it by using a sander. I got my sander from Harbor Freight.

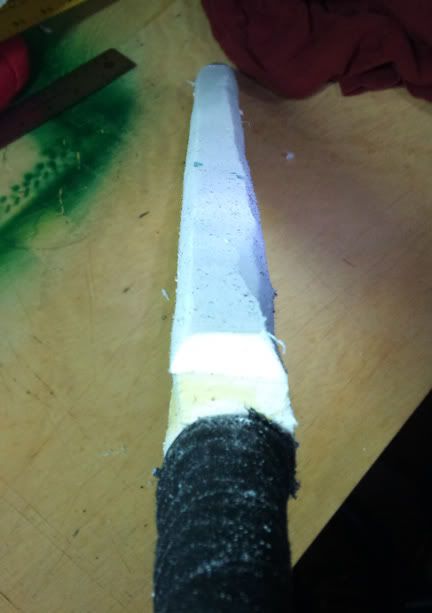
Step 7 - Sand that baby down (or you can use scissors/knife if you're patient and skillful) to shape it so that the outer edge blade is beveled.


Step 8 - Spiral wrap another layer of foam, this time going in the opposite direction of the previous wrap. I tend to use .375" thickness here at about 3 or 4" wide. Again, try to make your strip as long as possible (5+ feet) and start at the tip of the weapon so that you don't have to make a joint in the middle of the striking surface of your weapon.

If you do run out of foam and have to make a joint, hopefully your joint will be towards the bottom of the weapon away from the main striking area on the upper part of your weapon. I will cut down the strip to make sure the joint falls on the flat part of the blade. I cut another strip the same thickness and width and glue it to the end of the last strip to continue the wrap all the way down to the handle. Then I cover the joint with bidirectional strapping tape for maximum strength. I make sure I do not put the strapping tape on the striking edges of the weapon.

Step 9 - Cap it again (I use .625" again).

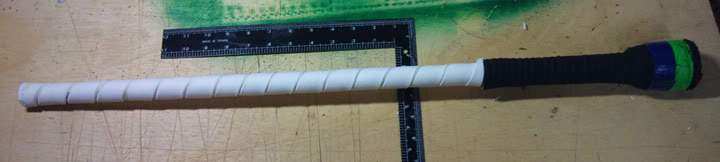
Step 10 - Finish the weapon as you see fit. Some people will leave it as it is and put a cover on, but I wrap my weapons in packing tape to increase the life of the weapon. Some games frown in the packing tape on the weapon, but in my opinion I believe that is silly. When I do tape the packing tape down, I tape over the end of the weapon first, then tape down the packing tape longways down the striking surface to run against the spiral. At this point I will also wrap the packing tape in a few circles around the caps/tip for just a little added strength to that area that will end up taking most of the abuse.
There ya go!
If you have any questions hit me up on Facebook ( Izec Cezi, https://www.facebook.com/people/Izec-Cezi/100002158261156 ). And if you have any suggestions on how to increase the life of this type of build feel free to contact me (such as I've heard of people gluing layers of fabric in between foam layers, but I've never tried it).
***FINAL NOTE: If you don't want to make an oval weapon, you can just make a round/cylindrical blue weapon by skipping the flat strips and just adding more spiral wraps (going in opposite directions). In my opinion, this cylindrical blue design in the most stable, longest lasting design of all as long as you don't mind using a round blue weapon.

Izec- Posts : 144
Join date : 2008-11-24
Location : Grim Sword - Austin, TX -

Page 1 of 1
Permissions in this forum:
You cannot reply to topics in this forum|
|
|